Prepare
At first, we need to do some preparations.
2. Set up your audio and MIDI devices
If you haven’t done it already, you should let REAPER know which audio and MIDI devices you are planning to use with it, because Playtime will use them as well!
-
Open the REAPER preferences via
-
In the section , configure your audio input and output.
-
In the section , configure your MIDI input devices, such as music keyboards.
-
In the section , configure your MIDI output devices, such as hardware synthesizers.
If you want to know more about this process, please consult the one and only REAPER user guide.
3. Fire up Playtime
Press the ![]() button in REAPER’s main toolbar, or use any of the alternative ways to start Playtime (described in Installation).
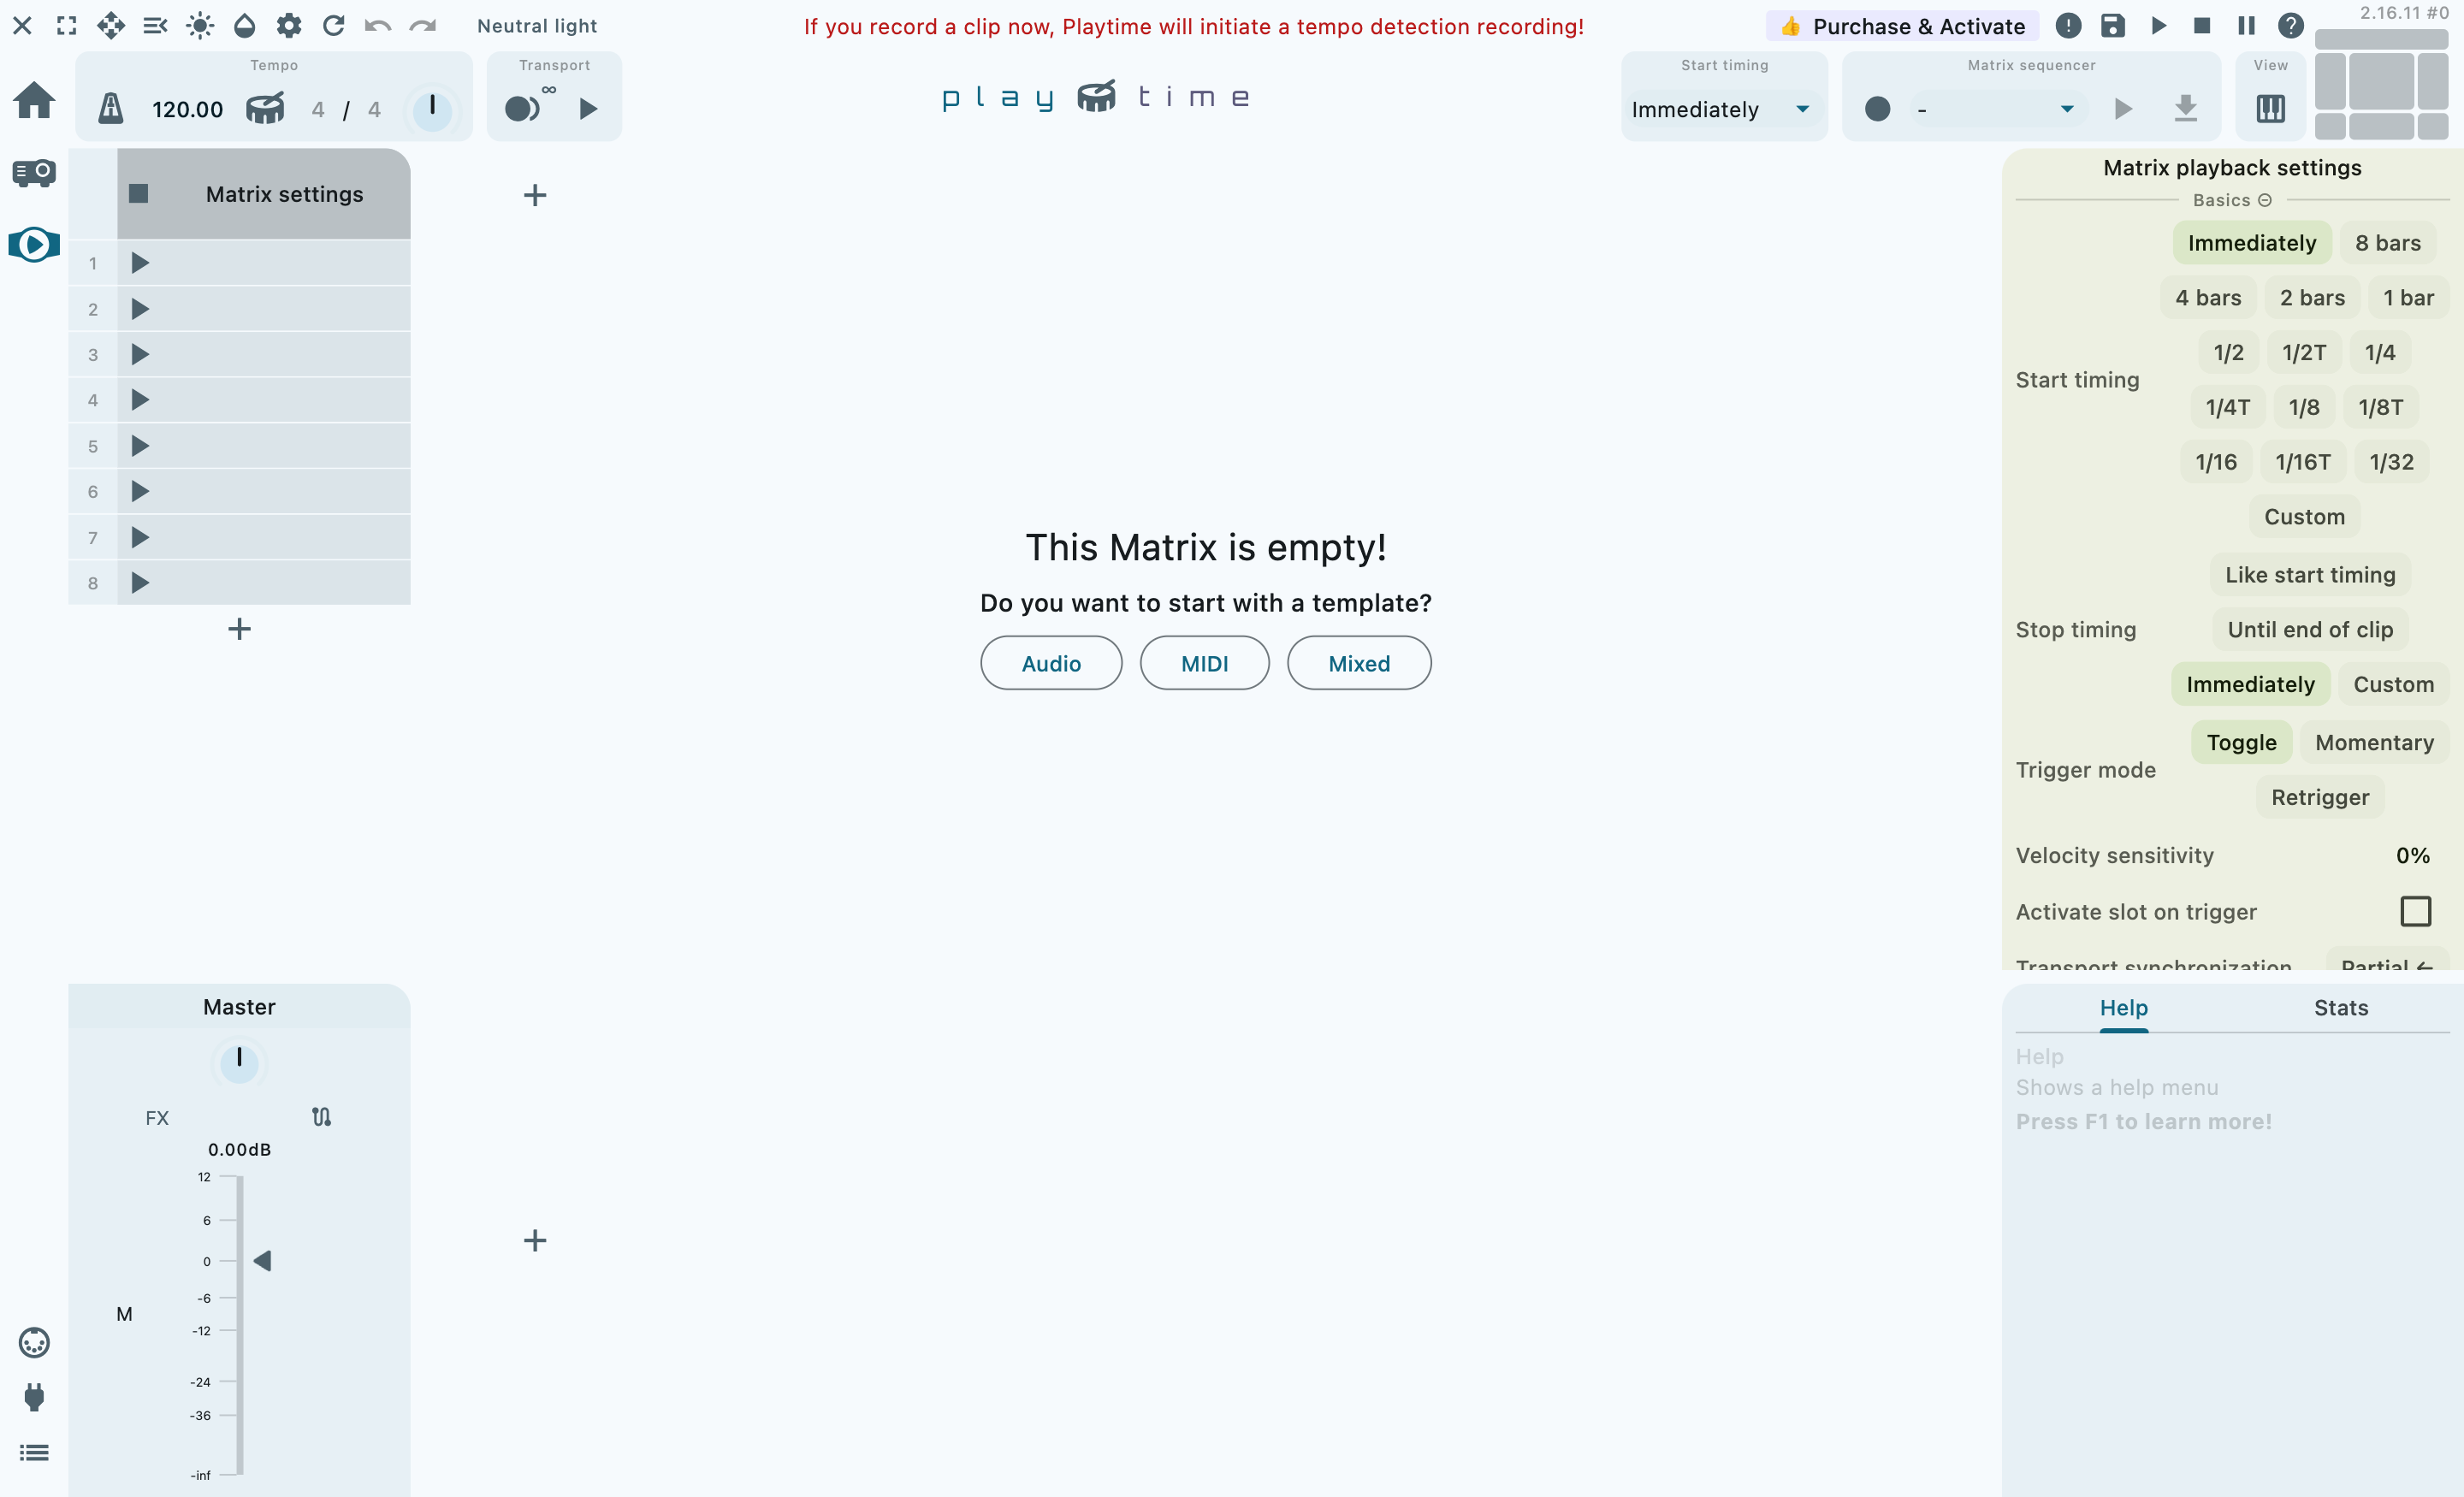
After pressing the button, you should see the Playtime window with an empty Matrix:
button in REAPER’s main toolbar, or use any of the alternative ways to start Playtime (described in Installation).
After pressing the button, you should see the Playtime window with an empty Matrix:

You can press Shift+Cmd/Ctrl+P to show/hide the Playtime window at any time.
At this point, you could directly continue with Create clips, but I strongly recommend to read the following deep dive, as it will improve your understanding of how Playtime works!