Toolbar
The bar directly below the window title bar is the Playtime toolbar. It provides quick access to essential performance controls, including play/stop, tempo adjustments, and more.

Tempo section
Provides tempo-related controls.
Metronome
Toggles the metronome.
Right-click to open the tempo settings dialog.
| The Playtime metronome is only audible when REAPER is not playing. When REAPER is playing, REAPER’s normal metronome takes over. This is also the reason why Playtime automatically syncs Playtime’s metronome on/off status to REAPER’s metronome on/off status. |
Tempo
Controls the project tempo. This is only possible as long as REAPER playback is stopped and no tempo marker exists in the project.
|
Development status: To be improved
The ability to follow the REAPER tempo envelope might come in a future update. Tempo adjustment during REAPER playback is disabled because of potential timing issues. It might be possible to fix this, but it needs a new feature on REAPER side. Please note: Using REAPER’s own tempo control during project playback is not a workaround! It will potentially cause the mentioned timing issues. |
Tap tempo
Click here repeatedly in order to tap the tempo. This is especially useful when playback is stopped, in which case it lets you conduct a count-in.
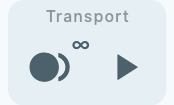
Transport section
Provides the Playtime transport controls.
Those are different from the REAPER transport controls, as Playtime is capable of playing and recording while REAPER is stopped.
Smart record
This is a convenience button for recording clips without first having to choose a particular matrix slot.
If nothing is recording yet, this will start recording into the next free slot of the first column whose track is armed.
If there is an ongoing recording, it will be stopped.
If playback is stopped, this button is displayed with a pulse animation. This indicates that pressing the button will trigger a count-in recording (if metronome enabled) or tempo detection recording (if metronome disabled).
Right-clicking the button lets you change various settings related to recording clips.
| Right-clicking the smart-record button opens the Smart-record menu. |
Start/stop playback
Pressing this button start or stops Playtime playback.
Stopping playback automatically ignites all clips that have been playing. After stopping, you can use the same button to start playback again or use the tap button to count in with a completely new tempo.
Starting playback also triggers playback of all previously ignited clips in the matrix. If you want to permanently stop all ignited clips before playback, simply click the matrix stop button.
If you want to start REAPER playback together with Playtime, you have two options:
-
Start playback within REAPER itself (which automatically starts Playtime playback)
-
Switch Transport synchronization to Full
Visual metronome
Shows the current position within the bar in beats. Can also be used for tempo tapping.
Matrix start timing
Decides when a clip actually starts playing after you have triggered its playback.
This setting applies to all clips in the matrix, but it can be overridden at column and clip level.
See Clip start timing.
Matrix sequencer
The matrix sequencer lets you record play and stop interactions with the matrix and write them to the arrangement when satisfied.
See Matrix sequence.
Record matrix sequence
Starts recording a new matrix performance
This will always create a new sequence. Old sequences are retained, so you can press this anytime without worrying to overwrite old sequences.
Even though the button turns red right after clicking it, you don’t need to rush with your performance. After recording, Playtime will automatically remove silence at the beginning of the sequence.
Write to arrangement
Writes the currently active matrix sequence to REAPER’s tracks
If the Playtime column tracks already contain items, pressing this button will show the Arrangement writing mode dialog.
See Record and write a sequence for details.
Show/hide MIDI triggers
Shows or hides MIDI triggers assigned to cells.
|
The purpose of this feature is to quickly create simple and instance-specific mappings of MIDI keys/pads/buttons to cells.
|
Here’s how you assign a new MIDI trigger to a cell or toolbar button, after showing the MIDI triggers:
-
Click the MIDI trigger area in the cell or next to the toolbar button. It should turn red, which indicates that Playtime waits for you to press something.
-
Press a key or foot switch on your music keyboard. The area should now turn back to its original color and the corresponding note name or MIDI CC number should appear.
-
You can now use the note or foot switch to trigger the cell or invoke the toolbar function.
|
Powered by ReaLearn
Playtime’s MIDI triggers are powered by ReaLearn, Helgobox’s controller integration solution. In fact, each Playtime MIDI trigger corresponds to one Mapping in ReaLearn’s Main unit. When you learn a MIDI trigger, you are actually learning the source of a ReaLearn mapping that Playtime automatically creates for you. The target is pre-configured by Playtime and is nothing more than one of the Playtime targets. The beauty of this is that under the hood, you have the complete power of ReaLearn at your disposal, including its Feedback capabilities! |


